
 US Dollar

2026 Jan 14th
Guide to sink 3 compartment: A Complete System
Guide to sink 3 compartment: A Complete System
A 3-compartment sink is the bedrock of manual dishwashing in any professional kitchen. It's a purpose-built system designed to guide every pot, pan, and utensil through a strict Wash, Rinse, and Sanitize sequence. This isn't just a best practice—it's a method mandated by health codes to stamp out foodborne illness and guarantee everything is hygienically clean.
Why a 3-Compartment Sink Is Your Kitchen's Hub
In the controlled chaos of a commercial kitchen, the three-compartment sink is much more than just a big piece of stainless steel. It's the command centre for your entire sanitation process, a non-negotiable tool for protecting public health and meeting stringent regulations. Getting it wrong can lead to serious headaches, from health code violations and hefty fines to the nightmare scenario of a foodborne illness outbreak.
Think of it as a dedicated assembly line, but instead of building dishes, its sole job is to break down grime and rebuild clean, safe, and ready-to-use wares. Each basin in the 3-compartment sink has a specific, unchangeable role that builds on the last, ensuring a methodical workflow that leaves no room for error.
The Core Workflow Explained
The entire system revolves around a simple but critical sequence: Wash, Rinse, and Sanitize. This process is engineered to first physically remove leftover food and grease, then eliminate the harmful microorganisms you can't even see. Mastering this flow is day-one stuff for any food service operation.
- Step 1: Wash. The first compartment is for hot, soapy water—usually at or above 43°C (110°F). This is where the real scrubbing happens to cut through grease and lift off stuck-on food.
- Step 2: Rinse. The second compartment holds clean, warm water. Its only job is to wash away all the soap from the first step. Skipping this or doing it poorly means the sanitizer in the next step won't work effectively.
- Step 3: Sanitize. The third and final compartment is where the magic happens. It uses either a chemical sanitizing solution mixed to a precise concentration or, alternatively, scalding hot water (at least 77°C or 171°F) to kill any lingering bacteria and pathogens.
This structured approach is the gold standard for doing dishes by hand. It guarantees that every item moves from dirty to clean to sanitized without any shortcuts that could lead to cross-contamination.
To make it even clearer, here's a quick breakdown of what happens in each basin.
The 3 Compartment Sink Workflow at a Glance
This table breaks down the distinct role of each basin in the wash, rinse, and sanitize process for quick reference.
| Compartment | Primary Purpose | Required Water Temperature | Typical Chemical Used |
|---|---|---|---|
| 1. Wash | Remove food debris and grease | At least 43°C (110°F) | Commercial-grade detergent |
| 2. Rinse | Remove all soap residue | Warm, clean water | None |
| 3. Sanitize | Kill bacteria and pathogens | Varies (77°C for hot water) | Sanitizer (e.g., quat, chlorine) |
Following this workflow isn't just about following rules; it's about building a bulletproof sanitation process from the ground up.
A Non-Negotiable Industry Standard
From the corner café to a massive catering hall, this system is a pillar of kitchen hygiene. Provincial health departments across Canada mandate these systems for manual warewashing, especially in places where an automatic dishwasher isn't available or just isn't practical for those huge pots and pans. You can browse our selection of essential commercial cleaning supplies at Chicken Pieces to keep your sanitation station fully stocked and compliant.
A properly managed three-compartment sink does more than just clean dishes; it actively protects your customers and your business's reputation. It is the first line of defence against contamination and a clear indicator of a professionally run kitchen.
Ultimately, understanding the function and importance of a 3-compartment sink is fundamental to running a safe and compliant food service business. It's not just about washing dishes—it's about committing to a standard of excellence in kitchen safety.
Navigating Health Codes and Compliance
Your three-compartment sink is more than just a place to wash dishes—it's one of your most critical tools for staying on the right side of the law. Health codes aren't just a random set of rules; they're a detailed roadmap designed to prevent foodborne illness and keep every customer safe. When you master these regulations, they stop feeling like a burden and become a solid framework for running a professional and reputable kitchen.
When a health inspector walks through your door, their eyes will eventually land on your warewashing station. And trust me, it's more than a quick glance to see if things look clean. They are trained to scrutinize your entire process with scientific precision, making sure your operation meets the strict standards set for public health.
What Health Inspectors Look For
An inspector's evaluation of your three-compartment sink is meticulous. They're not just winging it; they're checking for specific, measurable standards that have a direct impact on food safety. You can bet they'll be verifying a few key things.
- The Right Water Temperatures: They'll pull out a calibrated thermometer to check that your wash basin is holding at a minimum of 43°C (110°F). If you're using hot water to sanitize, they'll confirm that the third basin reaches and sustains 77°C (171°F).
- Accurate Sanitizer Concentrations: Using their own test strips, they will measure the parts per million (PPM) of your chemical sanitizer. They need to see that it's strong enough to effectively kill bacteria but not so concentrated that it leaves behind a harmful residue.
- A Clear and Proper Workflow: Inspectors want to see clear labels for each compartment—Wash, Rinse, Sanitize. They'll also watch to make sure your staff is following that sequence correctly every single time, without taking any shortcuts.
- Cleanliness and Upkeep: The sink itself has to be spotless, in good repair, and free of any clogs or backups. This includes making sure it drains properly to prevent greywater from splashing back and contaminating your clean dishes.
Failing an inspection is a lot more than a slap on the wrist. Non-compliance can trigger some serious consequences that hit your reputation and your bottom line hard—we're talking mandatory closures, steep fines, and even the threat of lawsuits if an outbreak is traced back to your kitchen.
Think of your three-compartment sink as your number one compliance tool. A health code violation isn't just a mark against your record; it's a glaring signal that there's a critical flaw in your food safety system. Staying ahead of that is everything.
Beyond the Sink: The Importance of Wastewater Management
Your responsibility doesn't stop once the water swirls down the drain. Regulatory bodies are paying more and more attention to what commercial kitchens are sending into municipal sewer systems. Wastewater loaded with fats, oils, and grease (FOG), not to mention food solids, is a major environmental headache.
This is exactly why the rules around grease traps and proper drainage are so strict. When FOG and solid waste get into the sewer lines, they can create massive blockages that lead to Sanitary Sewer Overflows (SSOs). An SSO is a raw sewage discharge, a serious public health event that can contaminate local waterways, parks, and streets.
The California State Water Resources Control Board, for example, has been tracking these systems for years. Since 2006, agencies across the state have been required to report every SSO, creating a massive database that draws a direct line between commercial kitchen practices and environmental health. It's a clear reminder that how you manage your three-compartment sink's drainage directly impacts California's ability to keep untreated wastewater out of public waters. You can dig into the data yourself by exploring the SSO reduction program data.
At the end of the day, following health and environmental codes is a fundamental part of running a successful business. By using and maintaining your three-compartment sink correctly, you're not just cleaning dishes—you're protecting your customers, your community, and the future of your business.
How to Choose the Right 3 Compartment Sink
Picking the right 3 compartment sink is one of those critical back-of-house decisions that directly impacts how smoothly your kitchen runs. This isn't just about ticking a box for the health inspector; it's about investing in a workhorse that can handle the daily grind of your operation, day in and day out.
The perfect sink for a high-volume restaurant is overkill for a small café, and a light-duty sink will get destroyed in a busy catering kitchen. It all comes down to finding the sweet spot between your daily needs, the space you have available, and your budget. Let's walk through the key things you need to consider to make a smart choice that lasts.
Decoding Stainless Steel: The Material That Matters
Walk into almost any commercial kitchen, and you'll see stainless steel sinks. There's a good reason for that—the material is tough, non-porous, and stands up to rust and corrosion like a champ. But here's the catch: not all stainless steel is the same. The most important detail you need to look at is the gauge, which is simply a measure of the metal's thickness.
Think of gauge like a golf score—the lower the number, the better (and thicker) the steel.
- 18-Gauge: This is your standard, budget-friendly option. It's perfectly fine for light-duty use in a small coffee shop or a business with a low volume of dishes. It gets the job done without the higher price tag.
- 16-Gauge: This is the industry sweet spot. A big step up in thickness and durability, 16-gauge is what you'll find in most restaurants and commercial kitchens. It offers the best balance of strength and value, easily handling the abuse of a busy service.
- 14-Gauge: This is the undisputed heavyweight champion. A 14-gauge 3 compartment sink is built for relentless, high-volume punishment. It's the top choice for institutional kitchens, large-scale catering operations, and any place where heavy pots and pans are getting slammed around all day.
While a lower gauge means a higher upfront cost, it almost always pays for itself in the long run with fewer dents and a much longer lifespan. For a busy kitchen, it's a wise investment.
Sizing Up Your Space and Needs
Once you've landed on a material, the next big question is size. A sink that's too small will create a major bottleneck in your workflow, with dishes piling up and staff getting frustrated. On the other hand, an oversized sink is just a waste of precious kitchen real estate.
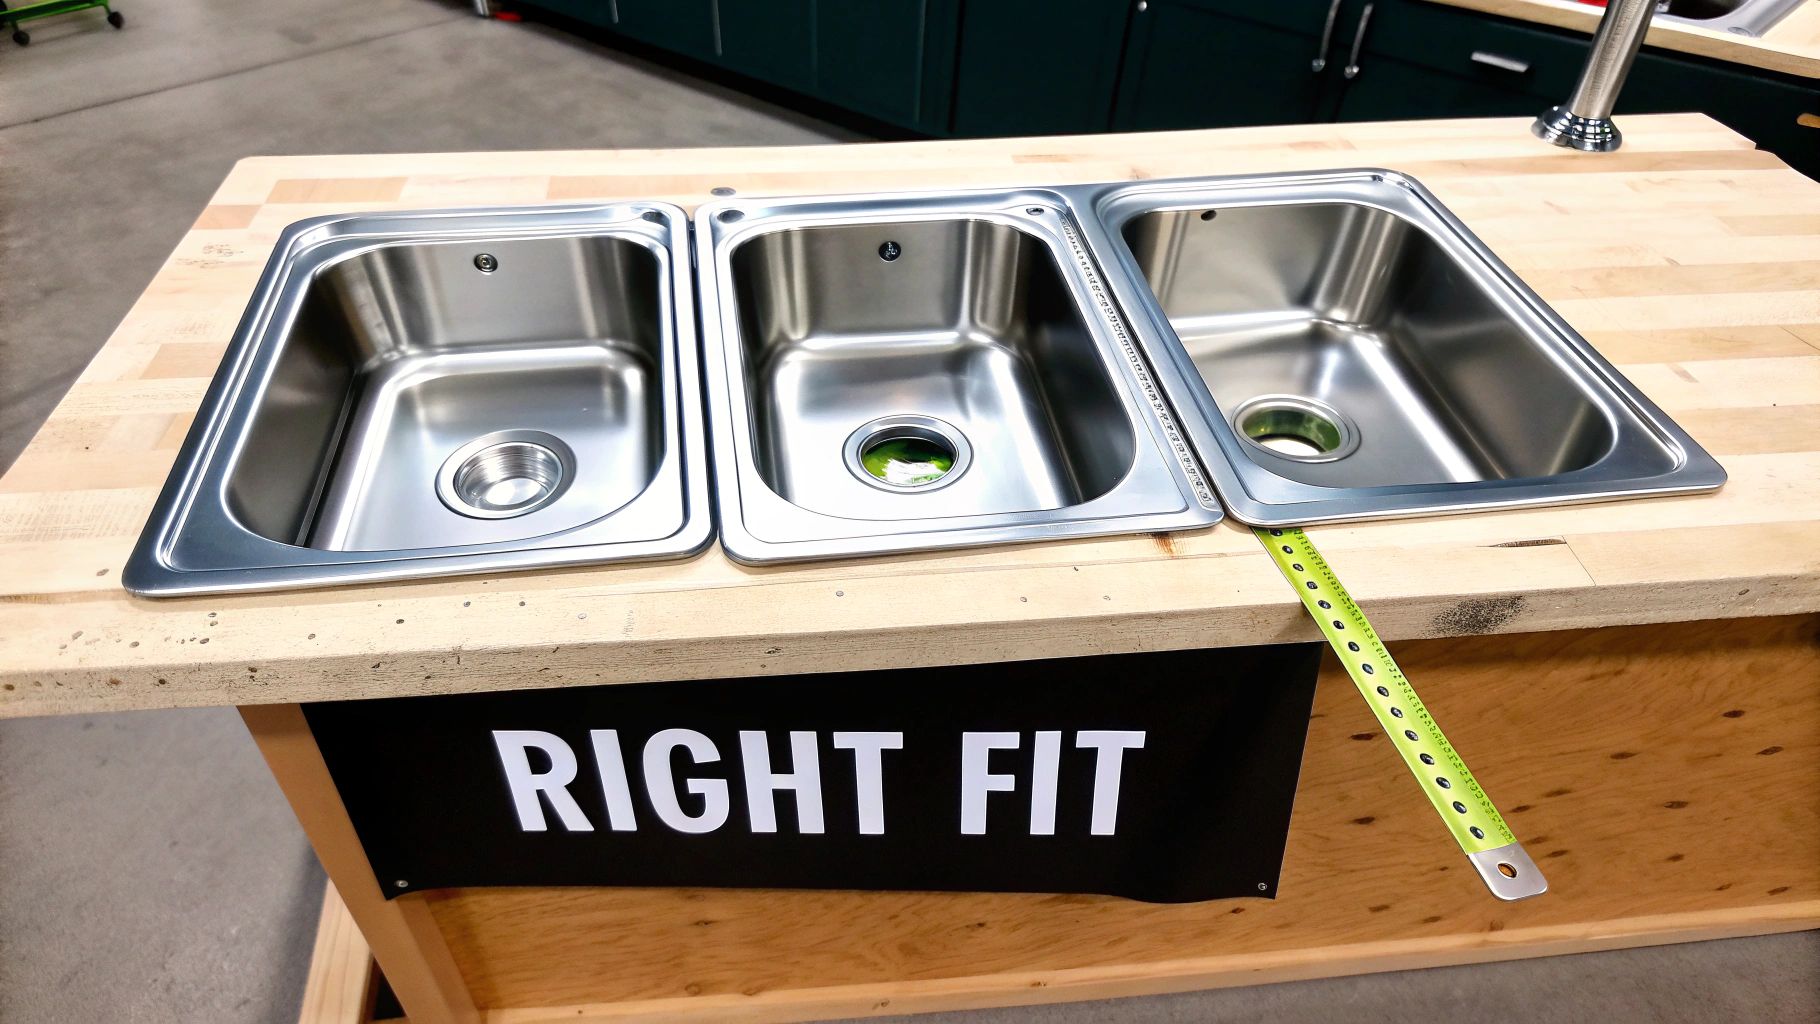
Before you do anything else, grab a tape measure. Then, think about the biggest, most awkward items you wash on a regular basis. Your largest stock pots, sheet pans, and mixing bowls—will they fit comfortably inside one of the sink basins for a proper scrub?
If your team has to tilt and angle big pots just to get them clean, you're losing time and creating a splash zone. A good rule of thumb is to pick sink bowls that are at least a few inches wider and deeper than the largest cookware you use frequently.
Choosing the right size is a strategic balance. The goal is to maximize washing capacity within your kitchen's footprint, ensuring your team has the tools they need to maintain a smooth and efficient sanitation workflow.
Essential Features: Drainboards and Backsplashes
Beyond the three main bowls, a couple of other features can make a huge difference in your sink's functionality: drainboards and a backsplash.
A drainboard is the sloped, grooved area on one or both sides of the sink. They are absolutely essential for an organized workflow. They give you a dedicated spot for dirty dishes to stack up before washing and a clean, separate space for sanitized items to air dry. In fact, most health codes demand two drainboards to keep dirty and clean items from cross-contaminating.
A backsplash is the raised lip that runs along the back of the sink unit. Its job is simple but crucial: protect your wall from constant splashes and water damage. A taller backsplash gives you more protection, which is a big deal in a high-volume setting. This simple feature helps keep the area clean and dry, preventing mould and mildew from growing on the wall behind your sink.
Picking the right sink involves a little homework, but getting it right from the start saves you countless headaches down the road. By thinking through the material gauge, overall size, and these key features, you can confidently choose a 3 compartment sink that's a perfect fit for your kitchen.
Now, let's break down how these features compare to help you zero in on the perfect unit for your specific needs.
Comparing 3 Compartment Sink Features
| Feature | Standard Option | Heavy-Duty Option | Best For |
|---|---|---|---|
| Material Gauge | 18-Gauge Stainless Steel | 16-Gauge or 14-Gauge Stainless Steel | Cafés and light-use kitchens (Standard) vs. Restaurants and high-volume operations (Heavy-Duty). |
| Drainboards | One drainboard (left or right) | Two drainboards (left and right) | Small spaces with lower volume (Standard) vs. Most commercial kitchens requiring separate soiled/clean areas (Heavy-Duty). |
| Bowl Size (Width) | 18" - 24" | 24" - 30" or larger | Kitchens washing standard pots and pans (Standard) vs. Operations cleaning large stock pots, sheet pans, or oversized equipment (Heavy-Duty). |
| Backsplash Height | 6" - 8" | 10" - 12" | General use with moderate splashing (Standard) vs. High-volume warewashing stations where splash control is critical (Heavy-Duty). |
This table should give you a clear picture of how different specs line up with operational demands. A small café can thrive with a standard 18-gauge sink, but a bustling restaurant will see a 16-gauge unit with two drainboards as a non-negotiable part of their workflow.
And of course, once your new sink is in place, you'll need the right chemicals to keep it running to code. You can find a full lineup of professional-grade commercial cleaning supplies at Chicken Pieces to make sure your warewashing station is ready for action from day one.
Getting Your Sink Installed the Right Way
A top-of-the-line 3 compartment sink is a fantastic piece of kit, but it's only as good as its installation. Getting the setup right is that final, crucial step that turns a heavy piece of steel into the sanitation workhorse of your kitchen. Nail this from the start, and you'll save yourself a world of headaches from frustrating leaks, slow drainage, and the kind of costly code violations that can shut you down before you even get going.
While it might be tempting to save a few bucks and tackle the job yourself, installing a commercial sink is a whole different beast than a simple home project. I always recommend calling in a professional. A licensed plumber knows the ins and outs of commercial codes, ensuring your sink is perfectly level, sealed tight, and properly tied into your water lines and—most importantly—your drainage system. This isn't just about making life easier; it's about compliance and safety.
The Non-Negotiable: NSF Certification
Before a single wrench is turned, the most critical part of the setup actually happens when you buy the sink. Always, always look for the NSF (National Sanitation Foundation) certification mark on any unit you're considering. That small seal is your guarantee that the sink has been put through the wringer and meets strict standards for public health and safety.
An NSF-certified sink means its materials and construction are durable, non-porous, and easy to clean, which helps prevent nasty bacteria from setting up shop. For most health departments, this certification isn't a suggestion—it's a hard requirement. It's a foundational part of your kitchen's compliance from day one.
Think of NSF certification not as a premium feature, but as the basic entry ticket for any equipment that touches your dishes or food. It's the industry's gold standard for safety, durability, and professional quality.
In fact, across Canada, three-compartment commercial sinks built to NSF standards have become the baseline for any serious food service business. A typical NSF-certified unit will be made from heavy-duty 18-gauge 304 stainless steel, with each basin around 10 inches deep to properly handle the whole wash, rinse, and sanitize process. If you want to see how these standards translate into real-world equipment, you can explore detailed product specifications to get a feel for what quality looks like.
Key Steps in the Installation Process
Even with a pro on the job, it helps to know what a proper installation looks like so you can make sure it's done right. A professional setup always follows a few key stages that are essential for long-term, trouble-free operation.
Here's a quick rundown of what a solid installation should cover:
- Levelling the Unit: The sink has to be perfectly level. If it's not, water will pool in the corners, leading to slow drainage, longer drying times, and potential sanitation headaches. Your installer will use a spirit level to adjust the feet until it's sitting perfectly flat.
- Connecting the Drains: Each of the three compartments gets its own drain, all connecting to a central plumbing line. Every connection needs to be sealed tight with the right gaskets and plumber's putty to prevent leaks, which can cause water damage and create some seriously unsanitary conditions under your sink.
- Installing the Faucet: A commercial-grade faucet, usually with a pre-rinse sprayer, is mounted next. Getting this secured properly with leak-free connections to the hot and cold water lines is critical for it to stand up to the daily abuse of a busy kitchen.
- Integrating the Grease Trap: This is probably the most crucial plumbing connection of all. The grease trap, or interceptor, is what catches all the fats, oils, and grease (FOG) before they head into the sewer system. A botched installation here can lead to nasty blockages, foul smells, and some pretty hefty fines from the city for non-compliance.
Making sure these steps are followed to the letter sets your kitchen up for success. A properly installed sink 3 compartment is a reliable workhorse that supports your team and protects your business, ensuring your whole sanitation workflow runs like a well-oiled machine for years to come.
Mastering the Wash, Rinse, Sanitize Method
Owning the right 3-compartment sink is a great start, but turning your team into sanitation pros is what truly protects your customers and your business. The Wash, Rinse, Sanitize method isn't just a list of steps—it's a critical workflow that, when done right, guarantees every single dish, pot, and utensil is impeccably clean and safe. Let's break down how the professionals execute this on the kitchen floor, turning basic rules into flawless habits.
First things first, a proper setup is the foundation for the entire process.
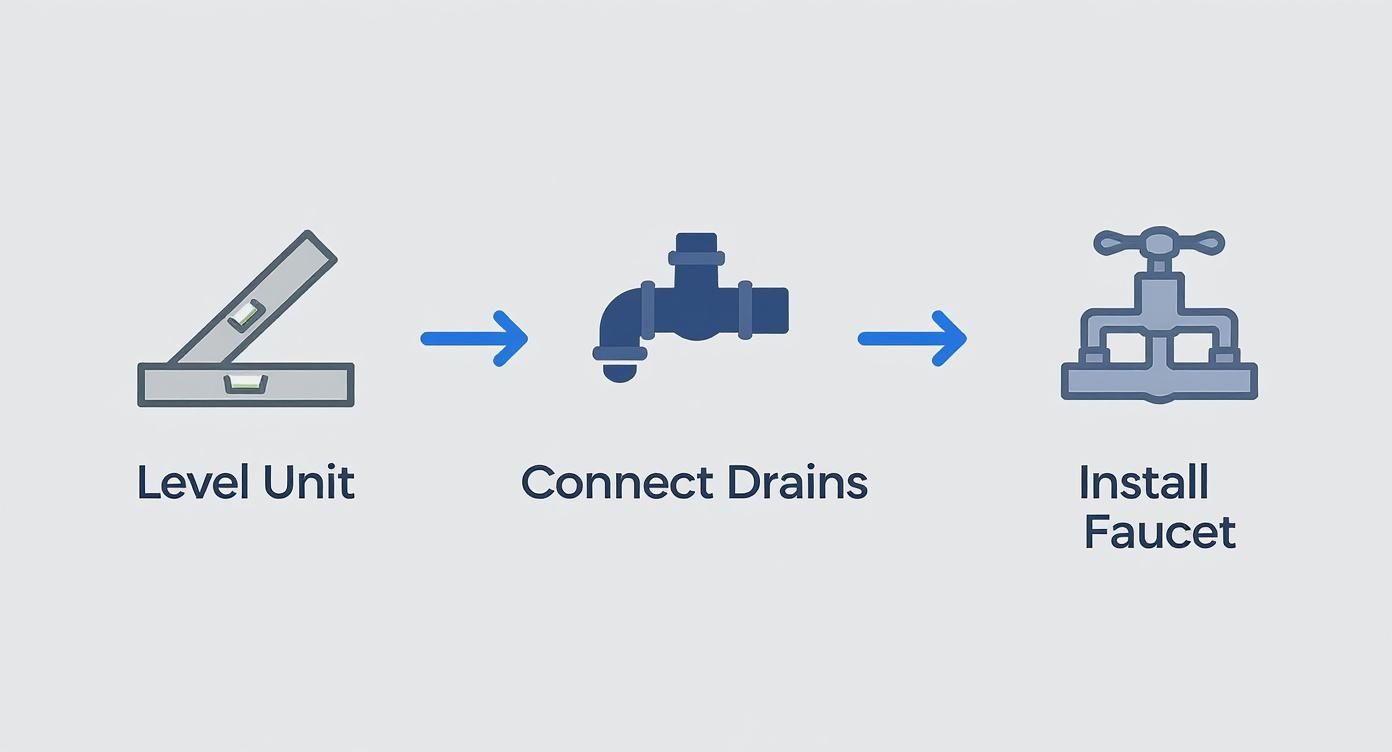
As the diagram shows, making sure the unit is level, the drains are securely connected, and the faucet is installed correctly is step zero. A wobbly sink or a leaky pipe will undermine your entire warewashing station before you even turn on the water.
Step 1: Scrape and Prepare
Before a single dish touches the water, the first and most important move is to pre-scrape. This isn't just about keeping the wash water cleaner for longer; it's the number one way to prevent your pipes from clogging with grease and chunks of food.
Grab a rubber spatula or a scraper and get all that visible food waste into a compost or garbage bin. For those stubborn, baked-on messes, a quick pre-soak in a separate tub will save you a ton of scrubbing time down the line. This simple habit makes the whole workflow drastically more efficient.
Step 2: The Wash Basin
The first sink compartment is where the real work happens. This is all about using hot water, soap, and some good old-fashioned elbow grease to physically break down and remove food and grease.
- Fill and Prep: Get the basin filled with hot water, making sure it's at least 43°C (110°F). Add the correct amount of commercial-grade detergent—always follow the manufacturer's instructions to the letter.
- Submerge and Scrub: Plunge the items completely underwater and scrub them with a brush or sponge. Working below the surface is key; it stops dirty water from splashing everywhere and focuses the scrubbing action right where you need it.
Step 3: The Rinse Basin
The second compartment looks simple, but its job is absolutely vital. Rinsing gets rid of every last trace of detergent from the wash cycle. If you leave any soap residue behind, it will completely neutralize the sanitizer in the next sink, making that final step useless.
Fill this basin with clean, warm water, again aiming for a temperature of at least 43°C (110°F). Dunk each item thoroughly, making sure every bubble and sud is washed away before you move on to the most critical stage.
Step 4: The Sanitize Basin
This is it—the third and final compartment. This is where you eliminate the invisible threats like bacteria and other pathogens. Remember, this step doesn't clean anything; it sanitizes a surface that's already clean. You've got two main ways to do this: chemicals or hot water.
Chemical Sanitizing:
This is the go-to method for most commercial kitchens. You mix a chemical solution with water to a very specific concentration.
- Temperature: The water usually needs to be lukewarm, somewhere between 24°C and 32°C (75°F-90°F), but check your chemical's label.
- Concentration: Use test strips to make sure your sanitizer is at the right strength (e.g., 50-100 ppm for chlorine, 200 ppm for quat). Don't guess.
- Contact Time: Items need to be fully submerged for the time specified by the manufacturer, which is typically at least 30 to 60 seconds, to ensure pathogens are killed.
Hot Water Sanitizing:
This method relies purely on heat. The water must be kept at a scalding 77°C (171°F), and items have to be submerged for a minimum of 30 seconds.
Proper sanitization is non-negotiable. Whether you use chemicals or hot water, precision is everything. Routinely checking temperatures and using test strips for sanitizer concentration is the only way to guarantee your process is effective and keeping you on the right side of the health inspector.
Step 5: The Final Air Dry
The job isn't done until the dishes are dry, and how they dry is just as important as how they were washed. Never, ever use a towel to dry your wares. Kitchen towels are notorious for harbouring bacteria, and you'll instantly recontaminate the perfectly clean surfaces you just worked so hard to sanitize.
Place everything on a clean, sanitized drainboard or drying rack and let them air dry completely. This final, hands-off step is the only way to ensure your dishes are truly ready for service without any risk of contamination. Keeping your station stocked with the right commercial cleaning supplies at Chicken Pieces is essential to making this entire process run smoothly.
Essential Maintenance and Troubleshooting
A high-quality 3-compartment sink is a serious investment, but its lifespan really comes down to how well you take care of it. Putting a few simple, consistent routines in place is the secret to stopping tiny annoyances from snowballing into expensive emergencies. A well-kept sink doesn't just last longer—it works better, prevents surprise downtime, and makes sure your kitchen is always up to code.
Think of it like a car. You wouldn't just skip oil changes and expect the engine to purr along for years, and the same logic applies here. A few minutes of attention at the end of each day, plus a slightly deeper check once a week, can add years to your sink's life and keep your whole warewashing station running like a dream.
Building a Proactive Maintenance Schedule
A simple, structured schedule makes sure nothing falls through the cracks. By breaking tasks into daily, weekly, and monthly lists, your team can easily keep the sink in top shape without feeling like it's a huge chore. It's all about turning maintenance from a task into a habit.
Daily Routine (End of Every Shift):
- Scrub and Sanitize All Basins: Once the last dish is done, drain every compartment. Get in there with a brush and a good detergent to scrub any grime from the basin walls, corners, and drains.
- Clear Strainers: Pull out all the sink strainers and empty them completely. Give them a thorough rinse to blast away any food bits that could cause clogs or smells.
- Wipe Down All Surfaces: Grab a clean cloth and sanitizer to wipe down the faucet, handles, backsplash, and drainboards.
Weekly Deep Clean:
- De-lime Faucets and Sprayers: Hard water minerals love to build up and choke off water flow. Soak your faucet heads and sprayer nozzles in a de-liming solution to dissolve all that crusty buildup.
- Inspect Plumbing Connections: Take a quick peek underneath the sink. You're looking for any slow drips or signs of moisture around the drain pipes and water supply lines.
- Thoroughly Clean the Grease Trap: Follow the manufacturer's guide for cleaning your grease trap. This is non-negotiable for preventing nasty backups and odours.
Troubleshooting Common Sink Problems
Even with the best maintenance routine, you'll run into a snag every now and then. Knowing how to quickly spot and fix these common issues can save you a service call and keep the kitchen from grinding to a halt.
A slow drain today can become a complete blockage tomorrow. Addressing minor issues immediately is the most effective way to prevent a warewashing shutdown during a busy service.
Here's a quick guide to tackling the most frequent sink headaches:
| Common Problem | Likely Cause | Solution |
|---|---|---|
| Slow Draining | Food debris or grease has built up in the P-trap. | Try a drain snake or plunger to break up the clog. If it's grease, carefully pour a pot of boiling water down the drain to melt it away. |
| Foul Odours | Trapped food particles are decaying in the drain or the grease trap. | After clearing any clogs, pour a mix of baking soda and vinegar down the drain, let it fizz, then follow up with hot water. Make sure that grease trap is getting cleaned on schedule. |
| Leaky Faucet | A small washer or O-ring inside the faucet handle or at its base has worn out. | Shut off the water supply to the sink. Then, take the faucet apart and replace the worn-out rubber washer or O-ring. It's usually a quick fix. |
By sticking to this maintenance plan, you're protecting the investment you made in your 3-compartment sink. Keeping your warewashing station clean and functional is a cornerstone of kitchen hygiene. Ensure your team is always ready by stocking up on essential janitorial and sanitation supplies from Chicken Pieces.
Got Questions? We've Got Answers.
Even after you've got the process down, a few specific questions always seem to pop up. Let's tackle the most common ones so you can run your kitchen with total confidence and keep the health inspector happy.
Can I Just Use One of the Sink Bays for Handwashing?
That's a hard no. Health codes across Canada are crystal clear on this: you absolutely must have a separate, dedicated sink just for handwashing.
Using your three-compartment sink for anything other than its intended purpose—whether it's washing hands, rinsing a mop head, or dumping old coffee—is a major health code violation. It introduces a huge risk of cross-contamination, and it's one of the first things an inspector will look for.
What's the Difference Between Sanitizing and Sterilizing?
This is a really common point of confusion, but the distinction is critical in any food business.
- Sanitizing is what you do in that third sink bay. It's all about reducing the number of microorganisms, like bacteria, on a surface down to a safe level for food contact. You'll achieve this with either a chemical solution or very hot water, as per your local health regulations.
- Sterilizing, on the other hand, is a much more aggressive process designed to kill all microbial life, including tough-to-kill spores. This level of cleaning is what you'd find in a hospital or a lab, not a restaurant kitchen. Your dishes need to be sanitary, not sterile.
Do I Really Need a Grease Trap with My Sink?
Yes, almost without exception. If you're running a commercial kitchen, local regulations will require you to install a grease trap (sometimes called a grease interceptor) with your sink 3 compartment.
This device is essential for capturing all the fats, oils, and grease (FOG) that get washed off your dishes. Without it, all that grease goes straight into the public sewer system, where it cools, solidifies, and creates massive, expensive blockages. Think of it as a non-negotiable part of your plumbing that keeps both your drains and your municipality happy.
Ready to equip your kitchen with the best? From heavy-duty sinks to the essential cleaning chemicals and supplies needed to run them, Chicken Pieces is your one-stop shop for everything your commercial kitchen needs.
Explore our full range of janitorial and sanitation supplies at https://www.chickenpieces.com.